How to Use Glow on Databricks Community Edition
Try Glow on Databricks for free with Databricks Community Edition.
Step 1: Sign up for Community Edition
Sign up for a free Databricks trial with Databricks Community Edition.
Fill out the Databricks free trial form and click “Sign Up”.
In the “Community Edition” section, click “Get Started”.
Click the “Get Started” link in your “Welcome to Databricks” verification email.
Set your password and click “Reset password”. You will be redirected to your Databricks Community Edition workspace.
Step 2: Import Glow notebooks
Import the Glow demonstration notebooks to your Databricks Community Edition workspace.

Log into your Databricks Community Edition workspace.
Download the desired Glow notebooks, such as
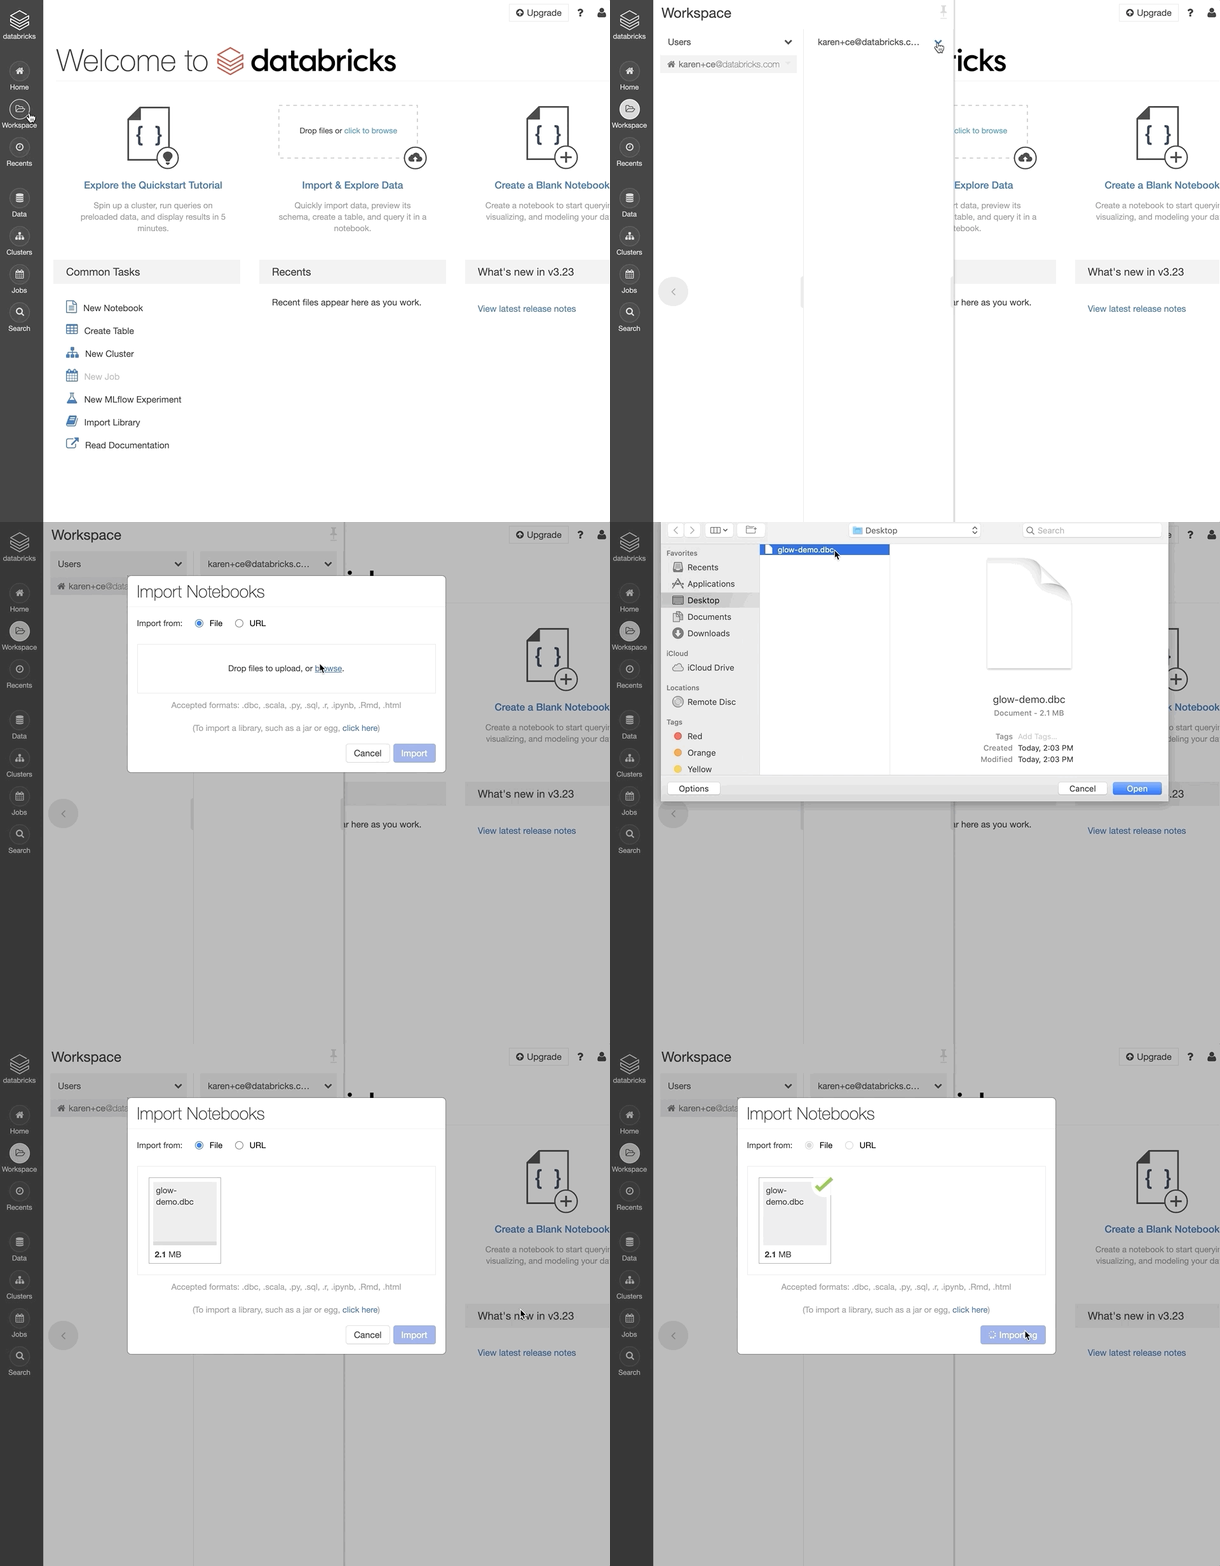
the GloWGR demo.Click the Workspace button in the left sidebar of your workspace.
In your user folder, right-click and select “Import”.
Select “Import from file”, select the downloaded notebook, and click “Import”.
Step 3: Create a cluster
Create the cluster shortly before you run the notebooks; the cluster will be automatically terminated after an idle period of 2 hours.
Log into your Databricks Community Edition workspace.
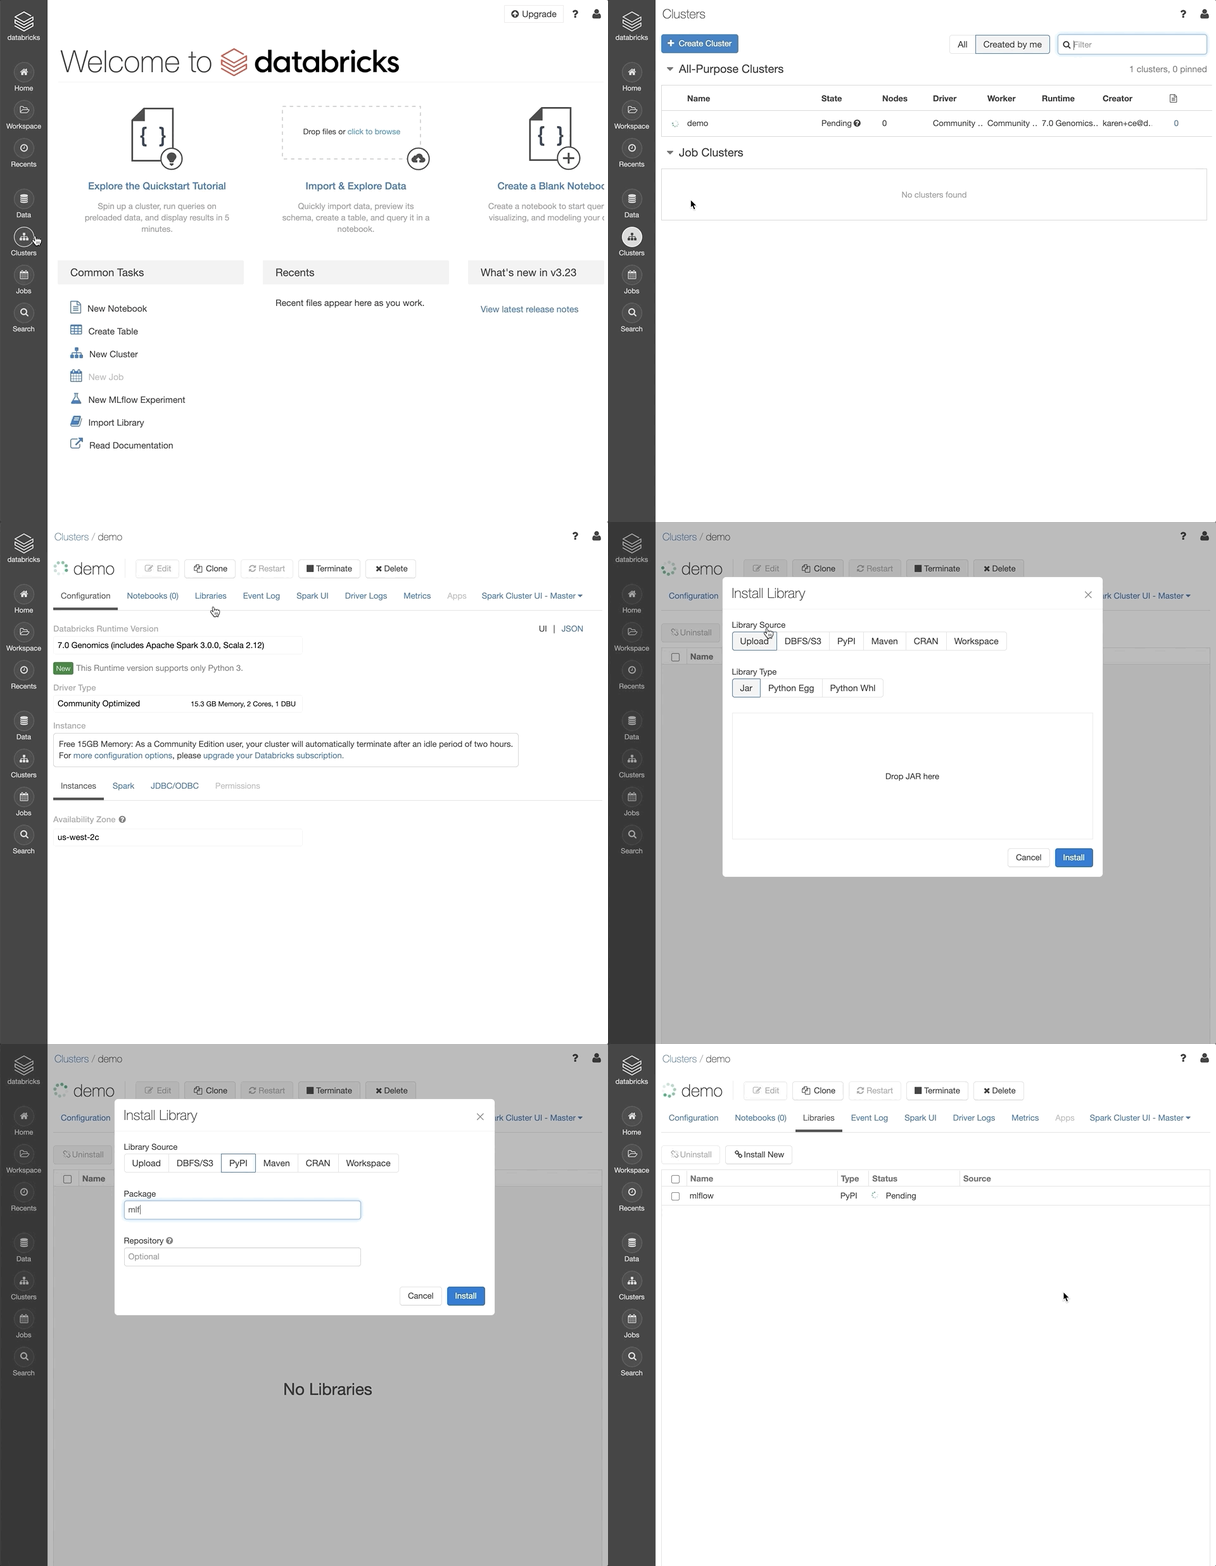
Click the Clusters button in the left sidebar of your workspace.
Set the “Cluster Name” as desired.
Click “Create Cluster”.
Refresh the page to see your new cluster in the list.
Step 4: Attach cluster-scoped libraries
Install libraries to a cluster in order to run third-party code.

Log into your Databricks Community Edition workspace.
Click the Clusters button in the left sidebar of your workspace.
Click an existing cluster.
Select the “Libraries” tab.
Click “Install New.”
Set the Library Source to
mavenand the Coordinates toio.projectglow:glow-spark3_2.12:${version}. Click “Install”.Set the Library Source to
PyPiand the Package toglow.py. Click “Install”.